When we built our house, we kept things to a minimum. Now and then I regret this decision because with the latest influx of grandkids (12.5 at last count), we no longer all fit here. Alas. Not that our house is small, it's just not big. Thus organization is a must, which segues nicely to a recent project--
My Sewing Cabinet
I do not have a dedicated sewing room. Instead, my sewing machine has occupied a spot on a small desk in one of our guest bedrooms. Visually, this isn't optimum when an overnight guest is on the premises. So I came up with an idea. (Unfortunately I didn't think of blogging about this until it was finished, so I can't show all the steps. But it's pretty simple.)
Step #1: Find a used TV armoire. I found this on Facebook Marketplace for $40.


Step #2: Remove all hardware and try not to lose any of it. Then remove the doors and don't lose them either.
Step #3: Thoroughly "buff" the entire surface with something like this gritty, scrubby material (not to be confused with those green scrub pads that you clean your pots and pans with) ....

.... to remove the glossy finish, because if you're foolish like me, you are wanting to paint it.
Step #4: (Here's where things went south for a while, so avoid following my example on this step.) Let me just say .... choose your paint carefully. Do not cut corners here. Don't believe the internet when it tells you to use an oil-base enamel paint. Don't use leftover paint that's been languishing for a few years on a shelf in your garage. If you happen to have a paint sprayer, don't use it on a hot day. Get yourself a small can of some good semi-gloss, water-base cabinet/trim paint.

Trust me on this so that, hopefully, you will not have to re-sand and repaint FOUR times. I am not kidding. Then, after you have all this figured out .... paint the darn thing.
Step #5: Somehow insert entire armoire into your house without gouging any walls or door frames.
Step #6: Reattach all hardware and doors because you did not lose them, right?!?
Here's where it starts to get fun .....
Step #7: I made a panel to cover the interior back wall, out of a cut-to-fit sheet of 1/4" hardboard, covered with 1/4" foam, and fabric, using spray glue and a hot glue gun. You can find the foam at JoAnn's and it has the word "naked" in the title. (I know not why .... ) Fabric stores are limited where I live and for whatever reason, I wanted an old-fashioned, grandma-ish print, which JoAnn's failed to produce. But good ol' Walmart came through. This panel was attached with screws.
Step #8: Build a shelf* to attach to the top of the cabinet interior for added storage. The doors of this particular armoire, when open, can slide inward into the body of the cabinet to be out of the way. So I left space between the sides of said shelf* and the interior sides of the cabinet to allow for the opened doors. Repeat, the shelf* basically hangs from the top of the cabinet interior. (If you are thoroughly confused by now, you will just have to come visit us and see it for yourself.) Above all, during the construction of this interior shelf*, do NOT injure yourself with any power tools especially if your spouse/partner has gone fishing and is not home. Paint and install.
Step #9: Install light fixture and power strip.
Step #10: Enlist husband (or anyone handy) to design/build a shelf, upon which your sewing machine will sit. Sand and stain (or paint). Then reenlist same husband/handy-person to mount it on heavy-duty drawer slides. (Warning, these slides are more expensive than you'd think.) This shelf, when installed, should sit about 30" from the floor, which is the standard height of a desk or table.
Step #11: Accessorize. On the inside of one of the doors, I installed spool racks which were also unexpectedly pricey considering I gave some away during our last move. On the inside of the other door, I attached a small wall-mount spice rack I had found at Home Goods several years previous (as I recall), for holding "bits and bobs".
Then trot on over to Dollar Tree for some inexpensive baskets.
Step #12: Step back and admire.
One of my worries was that this very tall black cabinet might overwhelm the room or frighten various wee grandkids trying to sleep nearby. But after moving it in, the room is fine .... and I think all visiting wee grandkids will be as well.
 |
| Ta-Da! |
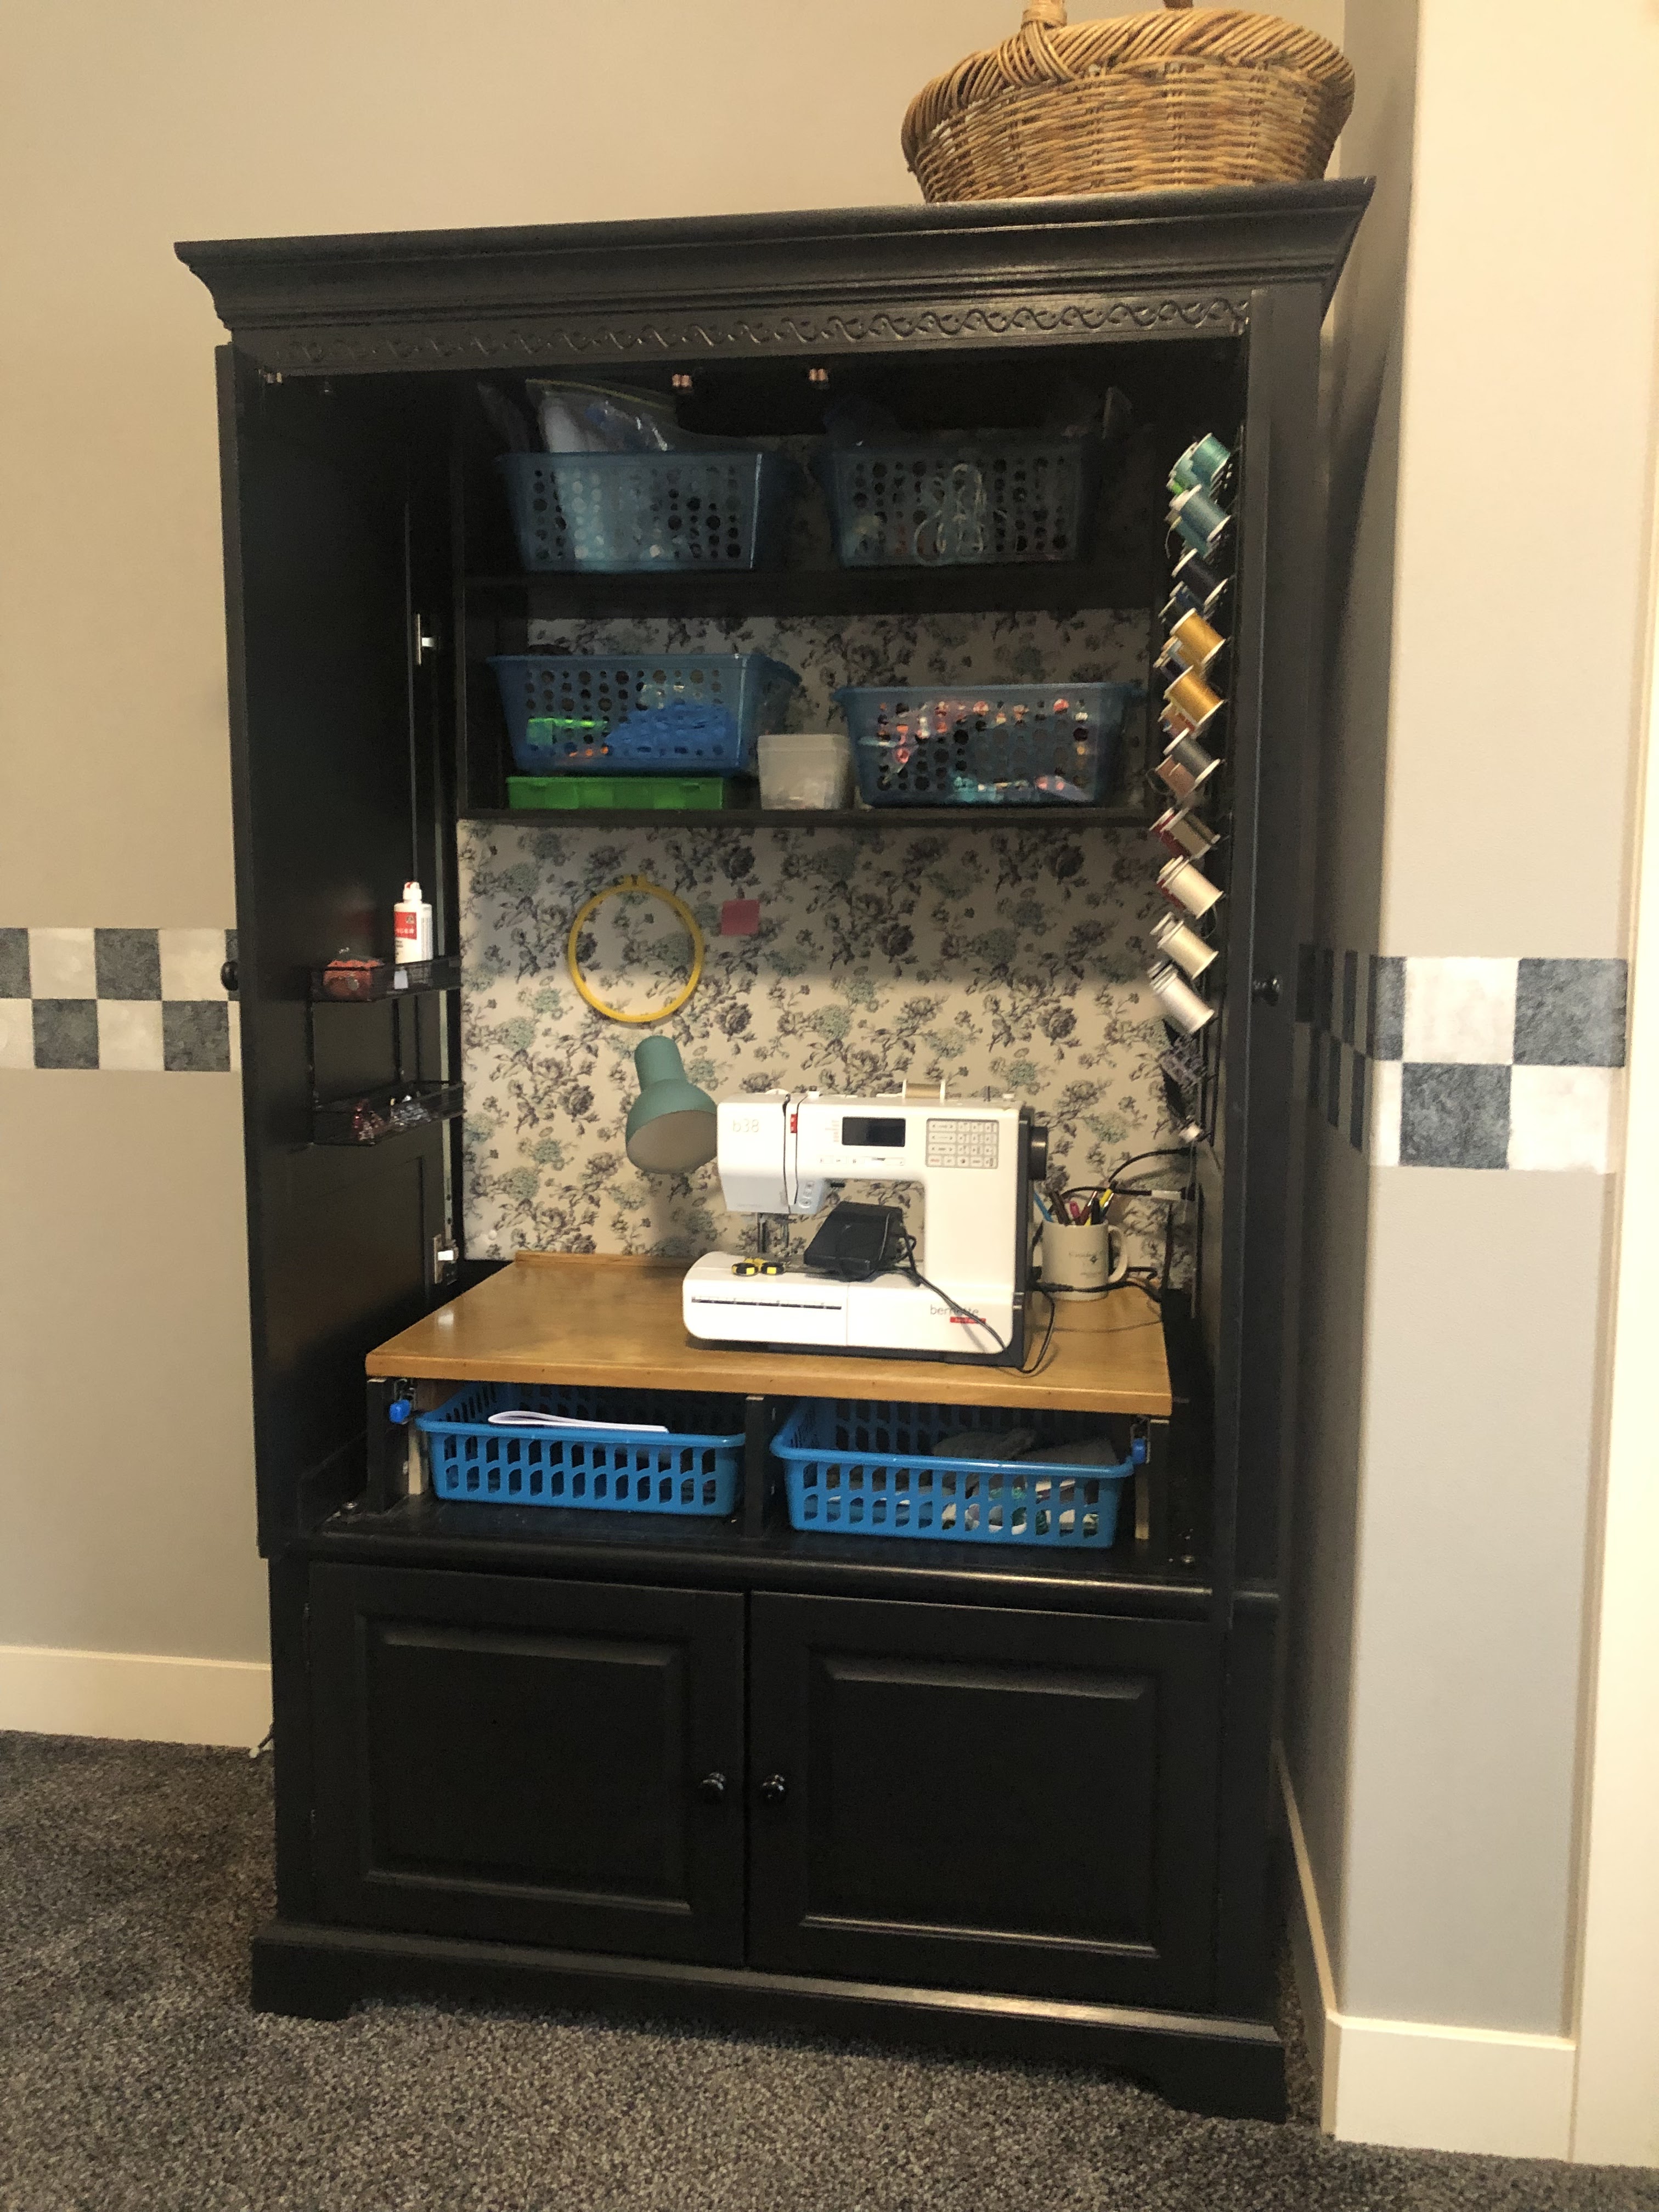
| I didn't turn the light on inside because in the photo it caused a glare. |

 |
| Oh yes .... I found these large cat litter bins that fit perfectly on the lower shelves, to hold fabric scraps. |
 |
| And in another corner, a rocking chair that was successfully painted on the first try! |
 |
| I'll go ahead and show the rest of the room, because it's cute. By the way, that table was a $3 find at Goodwill. It actually came that color! Everything else in this room (except bed, bedding and curtains and that curly thing above the bed that I found at Hobby Lobby) came from garage sales. |